Gearing up to start a new project. The Washington is still settling into its new home & seems a little stiff - the bed doesn't slide the way it used to. Hopefully that's just a matter of getting things moving again.
One of the aspects of handpress maintenance that I try to keep to a minimum is recovering the tympan, and to a lesser extent, the frisket. Both need to be covered with a sheet of thin, strong paper that is taut as a drum skin and flat as a board. Sometimes a new sheet dries funny & you have to start all over.
(Please note that the following basically is the method described in Gabriel Rummonds' excellent Printing on the Iron Handpress. Any discrepancies are my fault. His book should always be your first & best resource for information about printing.)
The tympan is the sheet on which a sheet to be printed rests. The frisket folds over the tympan and has windows cut into it, just big enough to allow the text area to print onto the sheet, while covering the non-printing margins and holding the sheet in place. The frisket & tympan also are the parts most likely to be missing if/when from a handpress.
You start with removing the old sheet. Right now, the tympan on the press is still good. The frisket, however, was old and many times patched, so it had to go. Both tympan and frisket basically are just metal rectangles (or wood & metal in the case of the tympan). The sheet is adhered with white glue, so replacing one begins with scraping away all the paper & glue around both sides of the frame. It's messy.
I have tried using wheat paste instead of glue, since it would be much easier to remove. But it doesn't dry fast enough to hold the paper in place while securing it all round the frame.
Linson paper is the best material for covering friskets. It's basically a commercial binding paper. There's one place in Canada, a few thousand miles from HM HQ, that wholesales it, but you must buy it in lifetime supplies and I don't want to store rolls of paper. So, I have been using good printmaking papers to cover friskets & tympans: Arches wove has worked well. I have a large stack of 115 g Somerset Book for the new project, so I tried that. It worked well.
Once the frame is as clean as possible, you cut a piece of paper that is 1 inch bigger all round. The surface you'll work on affects how things turn out: it must be solid but also somewhat absorbent (you'll see why). I cover the counter in a sheet of mill board.
I use a spray bottle to dampen one side of the sheet, & then leave it for a few minutes to expand and relax. Then I slip it and spray the other side. Depending on the paper I repeat this sequence - you need to judge how much moisture the sheet needs. You want it to fully relax, and hold that condition for enough time to secure the edges (5 minutes?).
Once the sheet is completely relaxed, brush a fairly wet glue around the edges in a perimeter to cover the bottom of the frisket and top (i.e. when the outer edge of the paper is folded back & over). Work fast. Make sure you have scrap paper beneath to catch any stray glue so it doesn't mess up the other side of the sheet.
Place the frisket on it so that the border edges are all (roughly) equal. Using very sharp scissors, make perpendicular cuts into the paper, up to the frisket's edge. These should be made every 3-4 inches.(In these photos you'll see I cut the strips first; I've done this enough on this frisket to know where things need to be.)
Now start folding these section over the frisket. Start in the middle of one side. Then do the opposite side, gently pulling the sheet as taut as possible (this is why you don't want any surface tension between the damp sheet & the surface it's lying on).
Then do the other two sides. With these four center pieces in place, work from the center of one side to either corner. Then do the opposite on the far side. Then the other two ends. Then repeat, working to the remaining corners. Keep pulling the paper (gently) as taut as possible. Fitting the paper around the hinges takes a bit of tailoring with scissors; you'll figure it out.
Once all the edges are secured, I cover then with a clear plastic packing tape that's wide enough to fold and cover both sides of the frame.
Hopefully the sheet looks pretty flat as this point. If you see a few wrinkles (if they appear it's usually near a corner), cross you fingers and hope they'll disappear when the sheet dries. In this case, mine did.
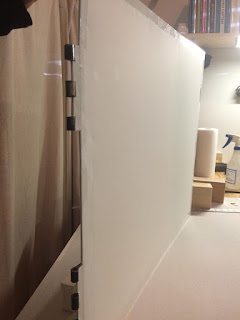
I leave the covered frisket standing vertical, resting on its hinges, to dry. Takes a couple of hours. Should sound like a bass drum when fully dry.
Things that can go wrong:
- The paper tears when drying. Probably isn't strong enough to use; try something different.
- The frame warps! That would take some seriously strong paper that expands a tremendous amount. Try something different.
- There are wrinkles/cockles. With a tympan this will ruin your printing; try again. With a frisket, depending how bad & where they are, you might be able to still use it. Probably save yourself grief to do it over.
The worst part about covering a frisket is that, as soon as it's back on the press, you have to cut holes in it!


