Trawling for printing stuff online (i.e. avoiding real work), ran across this item on eBay: a set of gauges for adjusting (leveling) the platen of a C&P-style press, even the ubiquitous tabletop Kelseys and Adanas that seem to be everywhere now. These gauges essentially function like the platen bearers that (should be) used when printing with a handpress: put one in each corner of the bed, and then adjust the platen so it is just touching all four at impression. These, however, have the advantage of being magnetic, which makes them much easier to use on a platen press's (vertical) bed. And the extra feature of being a gauge to check roller height is clever. All for what seems a reasonable price. I'm tempted to get a set just to have them. And if you have a handpress but don't yet have platen bearers, these would work just fine.

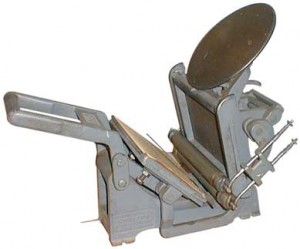
When I was printing with a Kelsey 5 x 8, a million years ago, I quickly learned that the only way to get even impression on forms that weren't equally distributed (e.g. a partial page facing a full page) was to adjust the platen accordingly. Makeready can do only so much. Those little presses are so small & weak, it often resulted in adjusting the platen wildly out of alignment to equalize the impression, and then getting adjusted back to level was always a hassle.
(WHY YOU SHOULDN'T TRY)
PRINTING WITH A KELSEY TABLETOP PRESS
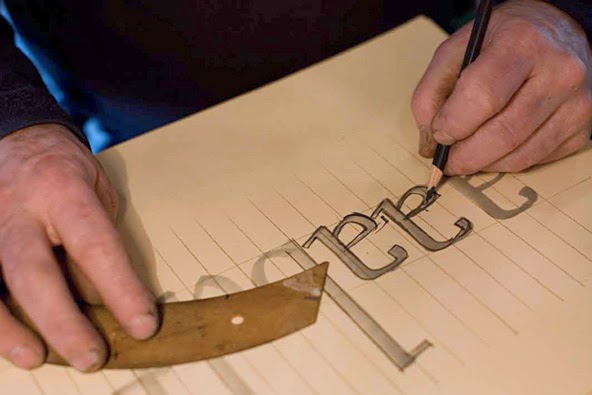
Writing that just now reminded me that four years ago I'd been contacted by someone who ran a site about Kelseys, asking me to write something about using one of those little presses to print a book. I did, but for whatever reason the guy didn't post it; maybe he didn't like my repeated warnings to Do Not Do What I Did. I found a copy of what I wrote, and so published here for the first time are my abbreviated notes for printing two-up on a 5 x 8 tabletop press. Sorry, no action shots to go with it.
❑ ❑ ❑ ❑ ❑
NO TABLETOP PRESS is really intended for bookwork. There just isn't (can't be) enough impression. But a beginner wouldn't know that until they've tried (as was my case), so if you're trying, here are a few tips.
First, what I printed on my Kelsey:
El Autobus Azul (1998): A miniature book with about 14 ages of text, about Costa Rican handmade papers. Just 15 copies issued. Set in 8-pt Centaur and Arrighi. Printed on a commercial "coffee" paper made is Costa Rica. Nothing special, & not ideal for letterpress. Lots of makeready, but reasonable results for a first effort. A 10th anniversary reprint (printed by David Clifford on his Heidelberg windmill) was published in an edition of 50 copies.

Fragments & Glimpses: Francesco Griffo da Bologna (1999). An 80-page biography of Aldus' typecutter, Francesco Griffo. Set in 8-pt Bembo. Page size 3.25 x 5 inches (two-up form measured 5 inches across, 3.5 inches tall; each page within the form was 2 inches wide, 3.5 inches tall). Printed in two colors on dampened Lana Wove (beautiful paper for books but they stopped making it around 2000). Edition of 32 copies. Just about killed me. Simon Fraser University has posted scans of the complete book.
Duensing Titling (2003). A miniature book with brief text (about 12 pages) by Jim Rimmer about designing & cutting Duensing Titling. (This book also had a linear fold-out section with all the letters printed in 60-pt on my Washington.) Set in 8-pt Bembo, printed damp, I think on Hahnemuhle.
Ars Anatomica (2004). A miniature book with text by Shinsuke Minegishi, and a series of his wood engravings laid in (he printed those, not me). Printed on Rives, dry.
Plus a handful of ephemeral things. The Kelsey was my go-to press for quick & recreational printing during the first few years, while I was still learning how to handle the Washington. I haven't used it in about five years [i.e. 2005] except for a day last Christmas when a friend brought a couple of her young art students by for a morning's introduction to printing. It's a great thing to have around for kids.

As a general rule, with any press the area being printed (your form) shouldn't be much more than 50% the area of the bed/platen. (The advertisement above, which measures 6 x 8.5 inches, disproves this general rule, but it's a single page printed on coated paper - not something you'd want to use for a book.) Thus, if printing two-up on a 5 x 8, your book can't be much more than a 16mo. Miniatures (pages no more than 3 inches in either dimension) probably are the best format to work within, particularly as there's a whole subculture of people interested in miniatures. You could print one page at a time, but I suspect the registration across the sheet becomes tricky, and there's risk of the half sticking up from the press flopping onto the rollers or ink wheel.

When I started, I tried to be very strict and pure about levelling the bed, keeping it level, and compensating for uneven forms with makeready. That's a mug's game: the bed falls unevenly much too easily on such small presses for makeready to truly compensate. After much frustration, I abandoned what I'd considered good press hygiene, and did what works: I noted & marked where the five platen adjustment bolts rested for a balanced impression, and then adjusted these settings for each new form, to achieve even/balanced impression (or as close as possible). Makeready was still required, but this at least got me closer to the desired result. The trick is to remember to return the platen to your original balanced settings after each form, so that you can begin again for the next.
[Balancing the bed: I put a 1-in piece of good wood type in each corner of the chase & pulled impressions until all four were printing evenly.]
Unbalanced forms also caused problems with the rollers: if there is text or an image on one side but not the other (assuming two-up), the rollers can be pulled below type height on the empty side, and thus lifted above type height on the opposite end, which should be inking your form. Remember, tiny differences can have big consequences with these presses. Adjusting the compression springs on the roller arms can help, but like the bed, you must have a way of marking the balanced (ideal) setting. I found it easier to build up layers of tape along the roller bearer on the side of the form without type. How much depends on the particular form, but you're looking to make the roller remain parallel as it travels across the type.
Using tape to adjust your rollers as they travel over different parts of the type is a good trick in many circumstances: e.g. to minimize the over-inking that can happen on a long line, or to smooth the rollers' transition on to and off of the type. This technique is crucial in handpress printing.

I pack my platen basically the same way I do a handpress. Beneath the tympan sheet:
- various weights of paper and Mylar (the type & combination decided when you balance your bed; your "ideal" of standard packing).
Above the tympan sheet:
- a Mylar base sheet, to which I affix guide pins
- a second, smaller Mylar sheet (within the area bounded by the guide pins, but beyond your printing area) to which I affix a register sheet (changed for each new form) on which makeready is done
- a hinged Mylar "window" which lies over the register/makeready sheet
Unless there's a reason not too, I print head down. Makeready is easier (the print on the register sheet is oriented for easy reading when your head's bent over the platen) and the foot of the sheet (which typically has a larger margin) can stick up/out from the platen if necessary.
That's really all there is to it:
- Work within the reasonable limits of your press.
- Be prepared to spend the time necessary on makeready.
- Consider the advantages of damping your paper (but also realize this means you must use a paper that can, & should be dampened).
- When frustrated with results, remind yourself that these presses really weren't meant for fine and/or ambitious printing.
Finally, I recommend that anyone interested in letterpress printing - regardless of the kind of press - read Gabriel Rummonds' Printing with the Iron Handpress. It has much background information on materials and techniques useful to people interested in fine (i.e. good) printing.
AND ANOTHER THING

Did you catch the story about the 14-year-old kid who started a project in 2011 to compare how much is ink is used by different digital faces, with the goal of finding one that is most efficient? Suvir Mirchandani's results were published recently in Harvard's Journal of Emerging Investigators. Very clever the way he assessed ink usage by converting the surface area of enlarged samples to volumes (on a standard substrate), and then compared weights. Similar to how Jim Rimmer transferred his type designs on a pantograph from enlarged maquettes (each copy of his book Leaves From the Pie Tree included an original letterform maquette tipped in). On one level, the visual weight of a face is an obvious consideration for choosing a face: the lighter the face, the less ink is required. Scaled up to a national level, that represents millions of dollars. Typographic considerations don't seem to have been a factor in the analysis, but maybe no typeface is up to the challenge of making a letter from the government less anxiety or rage inducing.